
On the lookout for a flooring contractor, one of our regular clients contacted us to avail our flooring services. He wanted us to install floor tiles in his entrance hall. Flooring is an integral part of every household and plays an essential role in determining the ambiance of a house. ASASA Construction is a leading Licensed and Insured Contractor in GTA with a decade of experience in delivering the most efficient services.
This project description will review this project's journey from the start till the end. We gathered all the requirements from the client in detail and penned them down. We presented various samples of tiles matching the needs of the client. Our professionals provided satisfactory answers to all the queries of the client. We suggested that the client fulfill all his budget demands and squeeze the expenses without giving up on quality. After gathering the information from the client, we presented a FREE Quote about the project containing all the financial details. This cost estimation included the price of the tiles and our service charges and aided the client in allocating the budget.
We are here to show you some of our best flooring projects. You can see our best commercial renovation projects before and after pictures below.
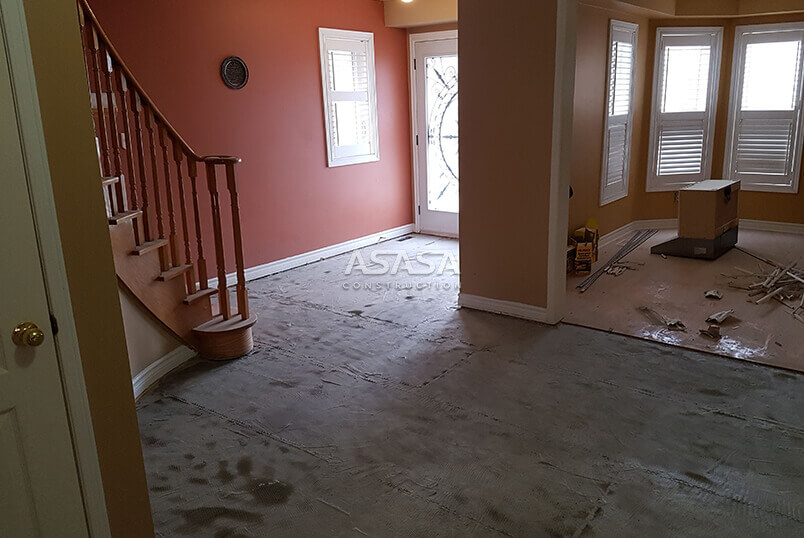
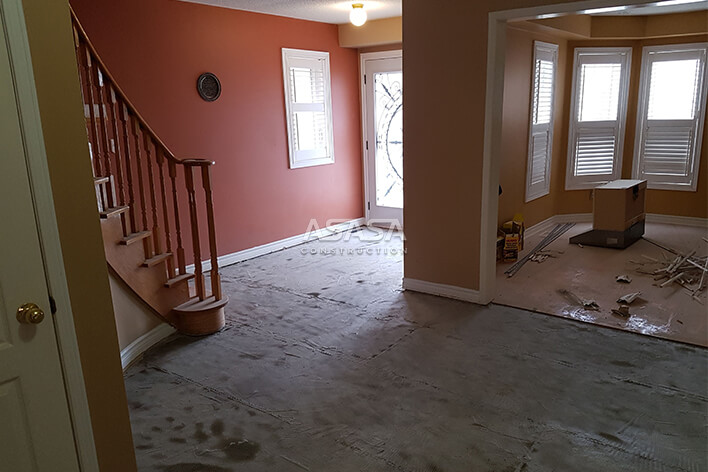
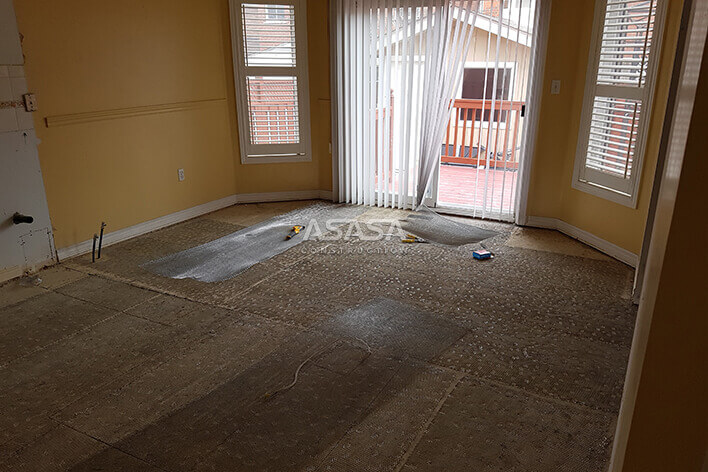
During the examination of the floor, we discovered a specific area that needed leveling and waterproofing. Our professionals poured a self-leveling underlayment on the floor to get an even sub-floor for installing tiles. After the underlayment settled and dried, we applied sealant for waterproofing. We provided the most appropriate adhesive that could control the sub-floor moisture effectively. We rechecked the surface level when the glue dried and proceeded further after confirmation.
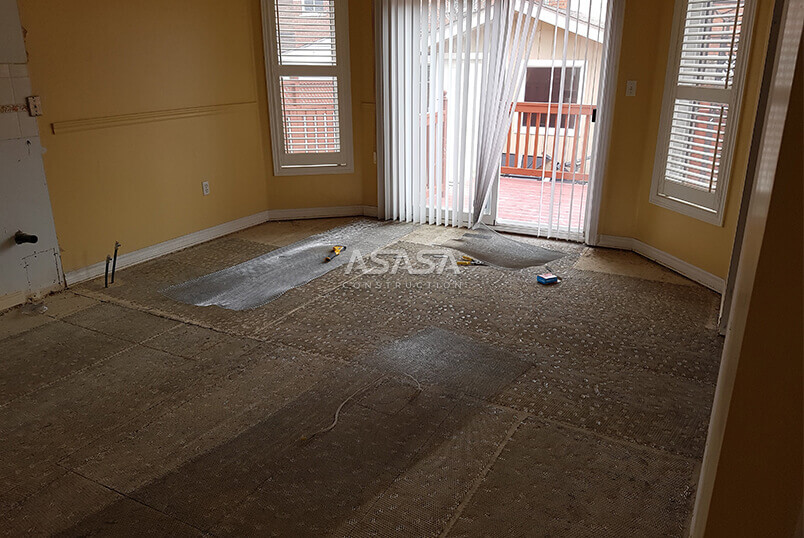 Before
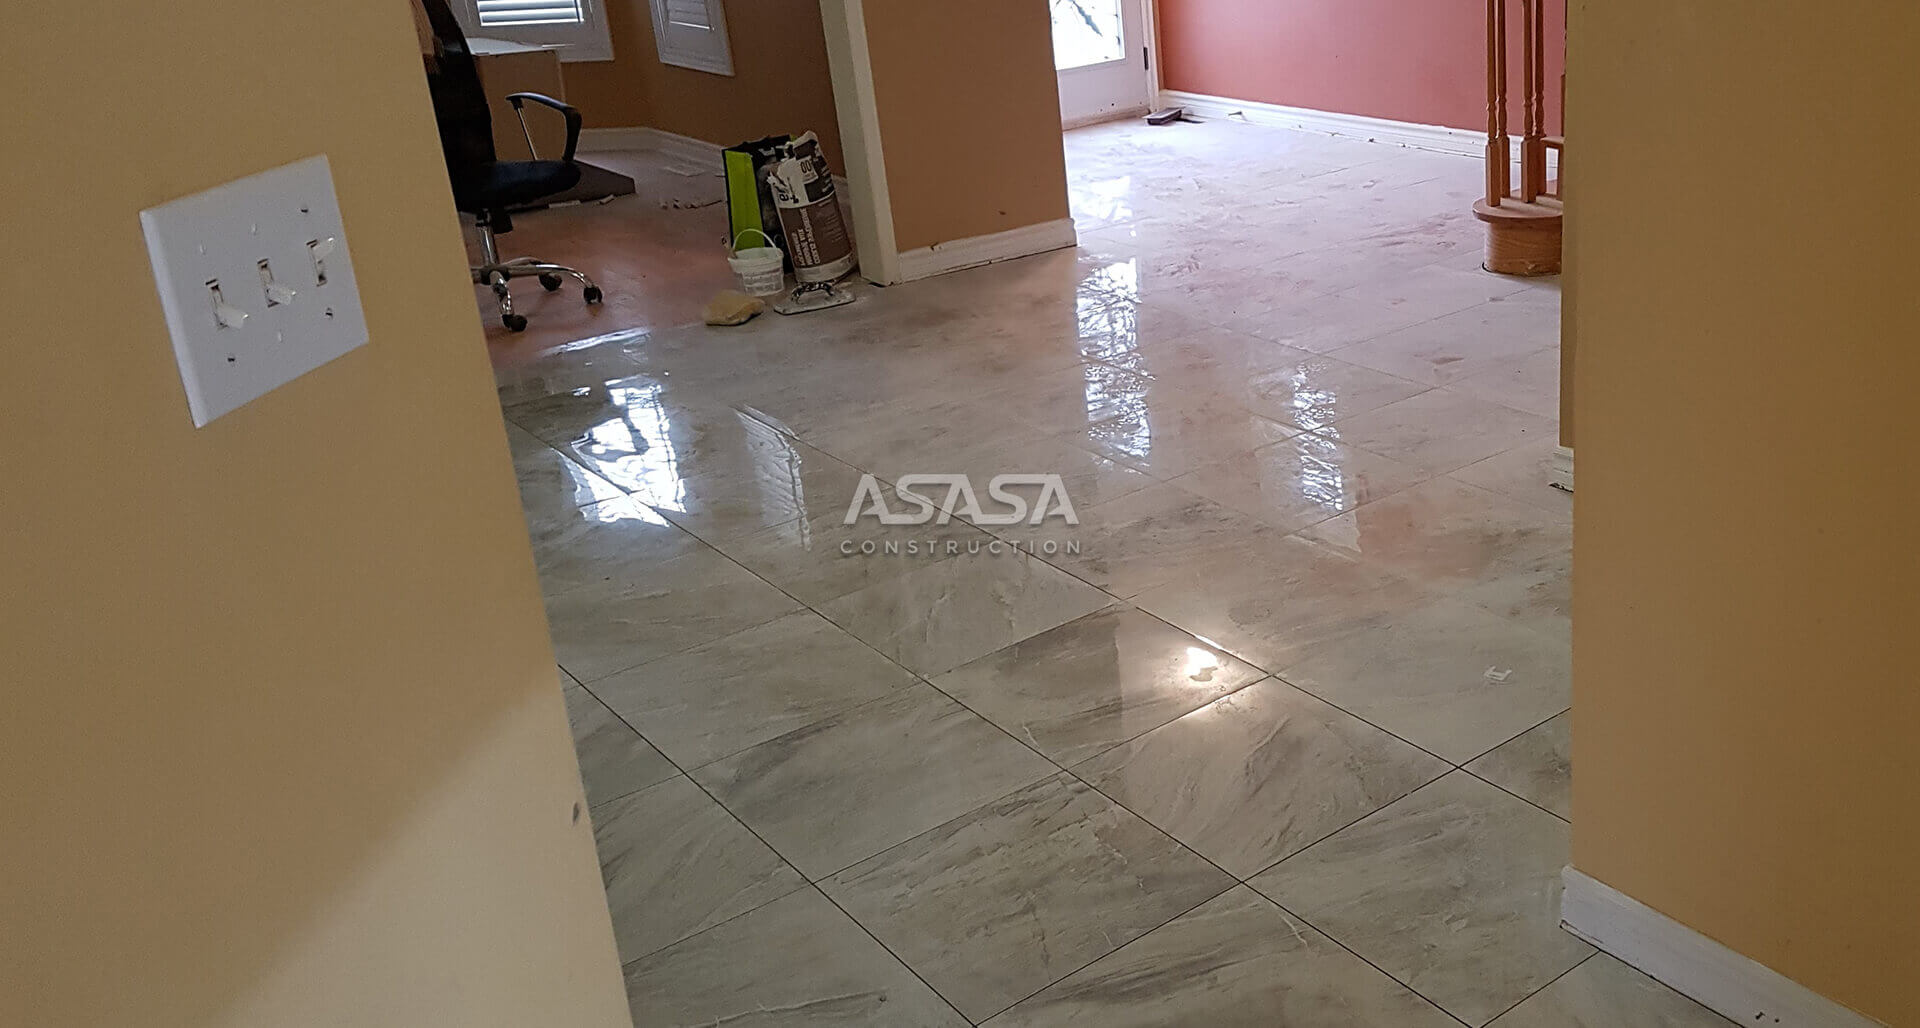
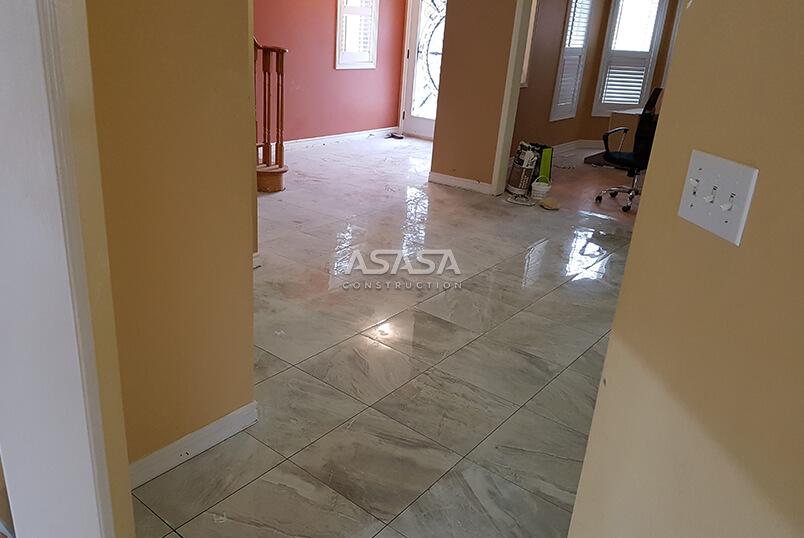
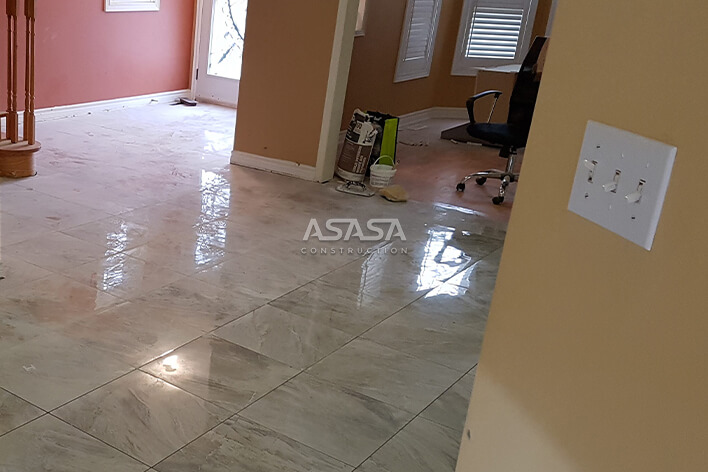
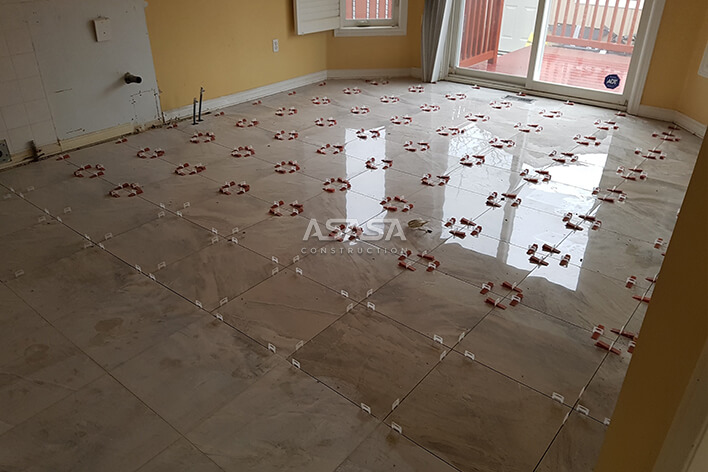
 After
After
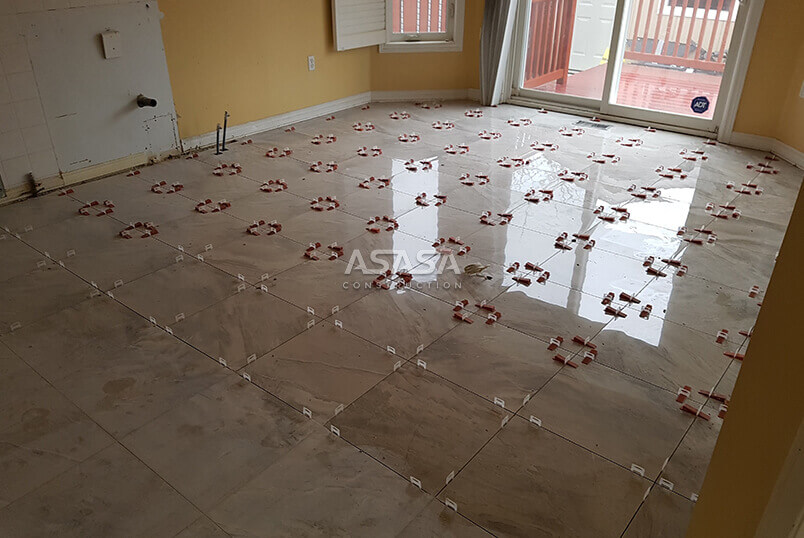
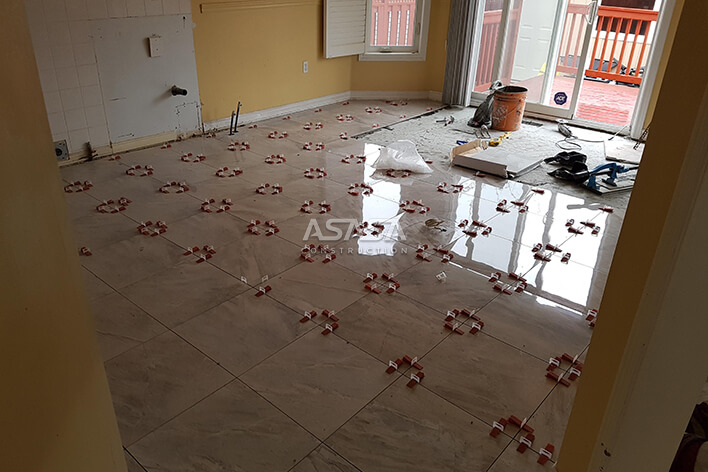
After leveling and sealing the sub-floor, we started the tile installation. A cannon was prepared initially with balanced consistency to get better adhesion. We determined the center point of the floor by taking accurate measurements. We started installing the tiles from the center to get an even layout for all corners. Each piece was adjusted carefully to get a consistent arrangement. Spacers were added to each tile to get equal gaps between parts. When we reached the corner tiles, we took measurements carefully to ensure that the corner tiles were cut equally. After cutting the tiles, they were installed efficiently with equal spacing between the tile and the wall. Excessive grout on the tiles was cleaned with water and a solution. After the tiles were spotless and dry, we presented the end product to the client.
 Before
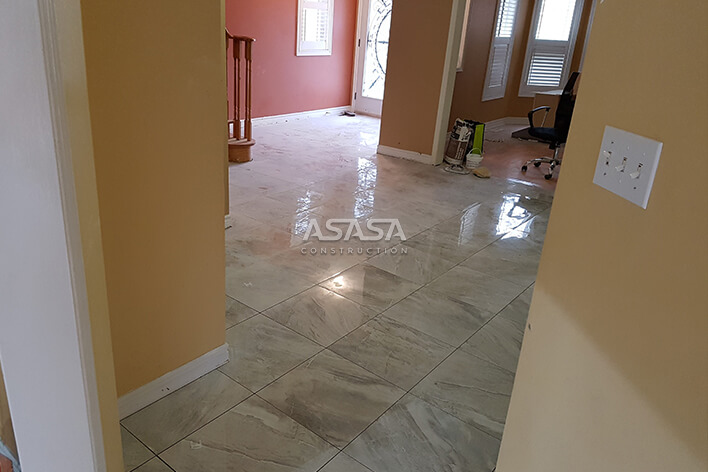
 After
After
Copyright© 2025 ASASA Construction - Developed by NetMaticO Digital Marketing Agency
